Build your own Renaissance Lute!
TOOLS NEEDED
I have tried very hard to list only the minimum you need, in order to keep the cost down. As with all pursuits, equipment buying can easily get to be very addictive!
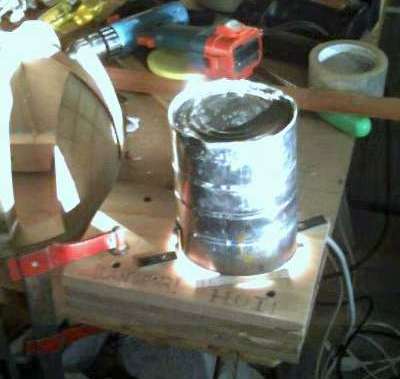
Glue pot.
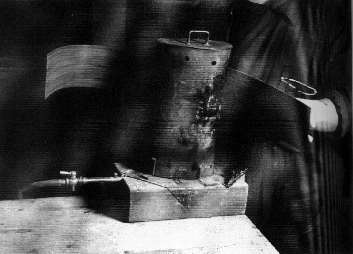
I shall be dealing exclusively with hide glue for the lute. Not only was it the only glue used in original instruments, it is still by far the best for instrument making. The glue needs to be heated with some water in a bain-marie so that you can keep it just below boiling point while you are using it. This could be an expensive thermostatically controlled professional job, but a simple ceramic basin in a saucepan of boiling water is perfectly adequate. A sort of double boiler is exactly what I use, with the glue itself in a ceramic pudding basin with a ceramic lid which a potter friend made, which has a small separate lid for the brush. You can see it in the background to this picture:
The separate brush lid is the brownish blob in the shape of an elephant's head. If you use the most primitive version of this with an open saucepan with a glass jar holding the glue standing in the water, the steam arising from the water partially condenses into the glue jar and keeps it in the right consistency for longer. My close-coupled basin and water boiler stops this happening and so the glue tends to evaporate off and become thick too quickly, hence the special lids.
Also get a small round hog bristle artists' brush to use as a glue brush. I will explain exactly how to use this kind of glue in the course and why it is so much better than any other. So you will need some of this glue, also known as Scotch glue, hide glue, hot glue, rabbit skin glue etc. Get the best you can, I strongly recommend getting it from musical instrument makers suppliers. [see the separate list] If any of you insist on using Titebond or any of the other modern glues, that is your affair and I will be giving no support!! It's for your own good, so there!!
Also do beware of the so-called Liquid Hide Glue, this sounds like a wonderful idea, but it's no good at all for instrument making!
For a wonderful summary of the superior qualities of hide glue and recommendations for its use click here to see the FAQ prepared by Craig Deller, which he has kindly given me permission to re-publish.
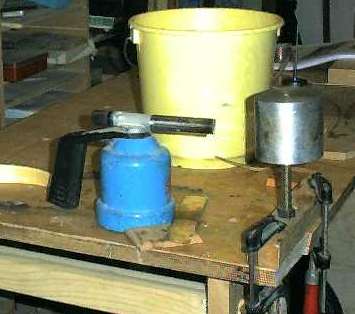
Terrell Elliott has sent this useful tip for a cheap glue pot. There are other things like baby bottle warmers that work well too.
" Dear David and all first time lute makers, On the list of minimum tools David listed a method for melting the hide glue, i.e. a double boiler, electric glue pot, etc. as one of the items needed. The electric glue pots designed just for this purpose are rather expensive. Woodcraft catalogue lists one at $89.99 and the same one is sold for $160.00 by the International Violin Company. Thanks to my wife however I have found a much more frugal alternative. My wife purchased an electric potpourri warmer for $3.00 at a Dollar store, "Family Dollar" to be exact, and gave it to me when the flower pattern began to fade on the outside, and I found a perfect electric glue pot. The capacity is not as high, about half of the volume of the electric glue pot, but it holds the glue at exactly 145 degrees F, identical to the electric glue pot. The glazed surface of the ceramic pot in the warmer is just as easy to clean up as the stainless steel pot in the electric glue pot, and I have been using it for small jobs for about a year and have had no problems with it at all. This can be even cheaper than a bargain double boiler and is a lot less hassle. The only draw back is the capacity, about 8 oz, then the .75 liter capacity of the commercial electric pot wins for larger jobs. The potpourri warmer sure beats the $100.00 price tag of the last electric glue pot I purchased. "
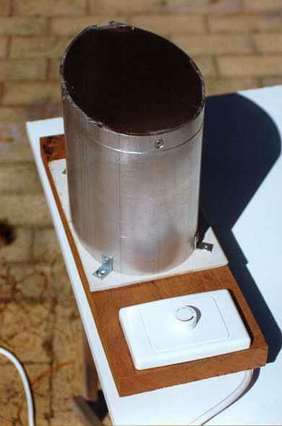
A bending iron.This is not as hard as it sounds. An ordinary radiant electric fire will just do, but better is some form of heated curved surface you can push the wood against. A piece of scaffold pipe with a small blowlamp heating it is fairly dangerous but efficient. This iron of mine was cast into aluminium in the local foundry from a wooden and cardboard original and is heated from within by an electric element. Commercial bending irons can be bought from the specialist musical instrument makers suppliers. Similar ones can be made up using a large soldering iron element inside a shaped piece of metal.

Here are three alternative bending irons made up by people on the courses.
This one is heated by an electric light bulb. If you use this system make sure the holder is able to resist the heat, plastic ones will melt, as will ordinary flex, use the heat-resistant wiring sold for electric heaters.
Don’t leave any of these unattended for a moment!
A nice looking bending iron made up out of a short section of yacht mast. If you live near the coast you might be able to scrounge an offcut from a chandler or a yacht yard.
And finally I thought you might be interested in this photo of the gas fired bending iron being used in the Ramirez workshop in Spain!
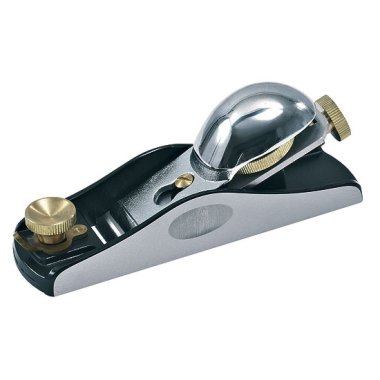
One small low-angle block plane. I no longer recommend either of the Stanley or Record planes Nos. 9-1/2 or 60-1/2, the manufacture has now been outsourced to India or China and the quality is now totally unacceptable for fine work. If you find an old secondhand example it will be fine but don’t buy new! The best option now are the different Chinese versions which are sold by Axminster, Dick and Rutlands and no doubt other suppliers in the US, these are beautifully machined and have nice thick blades and an adjustable throat which is useful for figured woods and for end-grain . I suspect that the same factory is making for each of these stores as the bodies appear so similar but the capping piece varies. This is a picture of the one obtainable from Rutland for example which they say is made by Qiangsheng Tool Co. If you want to pay silly money, you can buy the Lie Nielsen bronze equivalents but these new Chinese versions seem just as good.
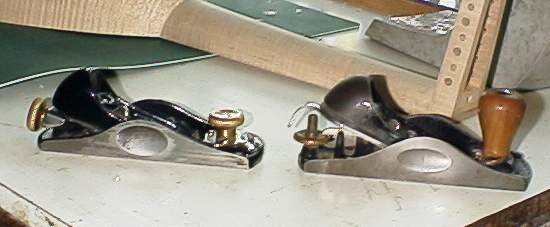
Japanese-style wooden pull planes are an acquired taste, people tell me they are wonderful but I prefer the ease of adjustment of the western iron body planes. These are my own old-style nicely made Record block planes, again don’t buy these nowadays!!
A good straight chisel about 20mm. wide.
Any reputable make will do. Personally I prefer the Japanese laminated chisels, which stay sharp longer and are quicker to sharpen. Axminster now sells exactly the sort of thin paring chisel I prefer, which has been unavailable for some years in England, their stock number for it is 267139. As far as I can see this is not available from Dick.
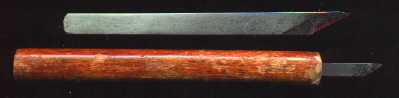
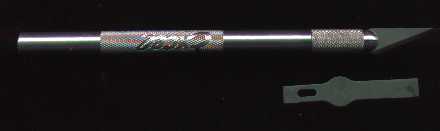
A violin makers knife between 6 and 10mm wide.
This is just a piece of very good steel with sharply pointed blade shape at the end. Often used without a handle. Again, I prefer the Japanese laminated steel, but only the highest quality 'Damascus steel' Japanese, the lower quality Japanese seem very brittle. The Swiss or German versions are very, very good, in some ways tougher, less likely to break off the extreme tip, which is the problem with all these knives, but they do take longer to sharpen. If you are a beginner, I would recommend the Swiss or German ones. In fact writing now in 2013 you can no longer buy any Japanese violin makers’ knives from Dick the German supplier instead the Japan Woodworker site seems the only place I’ve found on the web. There however some good knives from Hock in the USA which are available through other stockists; see my list of suppliers.
These are two of the knives I use, the one at the top is a Japanese laminated blade and the one at the bottom is a Swiss blade with handle.
A scalpel. You won't need this until you come to cutting the rose. I recommend the American X-acto scalpels in the small size, they hold their blades closer to the end and are therefore more stable than the English Swann Morton ones. The Canadian Veritas type are as good as the X-acto but nicer looking and therefore more expensive. However either would be fine. These are for piercing the rose and I will be recommending a way of modifying the blades for this purpose. Also get the little fine sawblade to fit this handle, it will be very useful for cutting off the ends of the bars.
An accurate ruler with metric markings.
If you are buying one specially I would recommend the thin flexible steel rulers such as Rabone No. 64 FR But to be honest a decent plastic ruler will be fine.
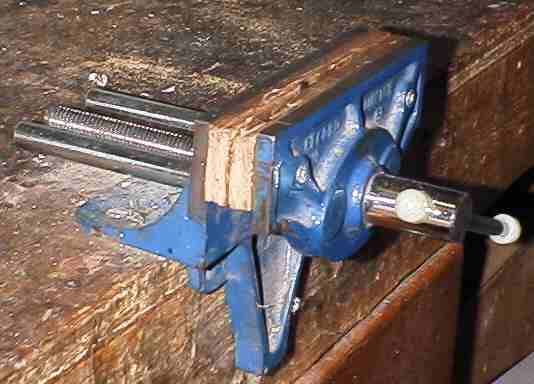
A small woodworking vice.
One that can open to 150mm will be just large enough. This can be either a table mounting one with a clamping screw for fastening temporarily to the kitchen table, or a more permanent affair screwed to a workbench. It does not have to be good quality, I find my cheap thirty year old one that came from a gift catalogue is especially useful because it is loose and can hold slightly tapering objects like lute bridges! The jaws need to be lined with a small piece of wood on each side to prevent marking your lute parts., see the illustration.
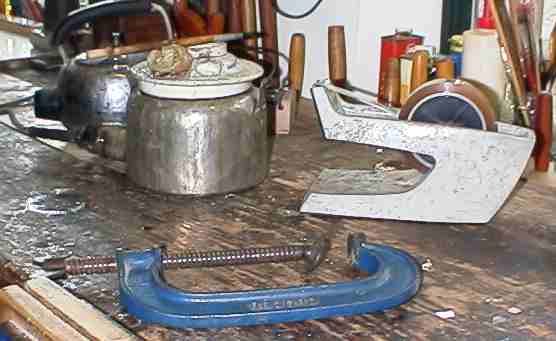
Two G cramps.
You will need to fasten one end of each rib to your table or workbench in order to plane it to thickness. The cheapest way of doing this is to use a G cramp and a piece of scrap wood to protect the rib. The size of the G cramp, therefore, depends on the thickness of your table. The other G cramp is to cramp the fingerboard on to the neck. It may seem excessive but I would advise getting 150mm size, because a baroque lute neck is quite wide and you need the pressure to be central.
A roll of Sellotape and dispenser.
Well, actually do not get real Sellotape, as it is not strong enough! Get the much cheaper polypropylene tape which stretches and cannot be broken by hand. My system of building the back relies heavily on this adhesive tape and it is worth finding the right stuff. Everybody says 'What did the original makers do without sellotape?' but they probably used pins into their moulds with wedges to hold each rib hard up to the next one. No moulds have survived so we don't know. But most makers now use tape.
The picture also shows my glue pot and glue brush and the recommended size of G cramp.
An ordinary hand drill.
You've probably got one somewhere! You don't need an electric drill. Four drill bits are needed: 1.1mm, 1.5mm, 3mm, and 4.3mm.
A small saw.
A coping saw will do everything you need. A small bandsaw is incredibly useful but you CAN get away with just a hand saw, and the coping saw will enable you to cut out the inside of the mould, which otherwise would be difficult.
A small fretsaw or jeweller's saw.
With a packet of medium blades. This is not for the rose (!) which is cut with knives, but for cutting out the bridge.
A screwdriver!
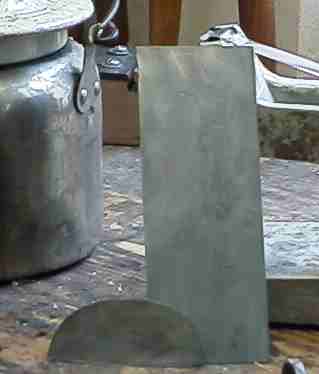
A piece of cabinet scraper steel.
Get a piece about 0.5mm thick and borrow some tin-snips to cut it into a curved shape as shown in the picture. I will give detailed instructions on sharpening this, which, surprisingly, is an almost unknown art!
A pair of calipers. For measuring the thickness of your ribs, the diameter of the pegs and the edges of the soundboard. These can be very expensive but this is not necessary, get the cheapest and smallest you can find. You also need a long-reach caliper to measure the thickness of the soundboard all over, however these are expensive from specialist instrument makers suppliers. I show here a version I had cast in aluminium by a local foundry, but it is possible to achieve the same function with a bolted together construction of angle aluminium to hold the dial gauge a set distance apart from the “anvil”, I will be giving details during the course. Next to it on the right is the cheap caliper.

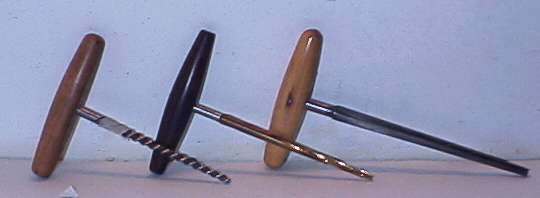
A reamer
This should be 1 in 30 taper, in other words the standard violin peg taper reamer. The specialist suppliers stock these. This will fit the pegs that Phil Brown and Bruce Brook produce. If you are going to make your own pegs it would be possible to use the quick spiral taper pin reamer at 1 in 48 taper. This, however, means that you will have to use the harder wood for pegs such as cocobolo, as the softer woods like plum will push through too much. One advantage of these reamers is that they can be used in a hand drill or even an electric drill and make fitting the pegs much quicker. They also cut more smoothly, though they do take a bit of getting used to as they have a reverse spiral and try to push themselves out of the work, rather than pulling themselves in or being neutral like a drill. However since first writing this course the German firm of Dick have produced a series of spiral taper hand reamers in 1 in 30 taper for violins and these cut so well that I have entirely gone over to these, even though they are rather expensive. For lutes I recommend using their small violin spiral reamer (No. 730531) as shown in the centre of this picture.
For some reason Dick have produced a 1in 25 reamer which they say is for lutes, but I would still recommend the violin taper. I can't think why they reckon lutes need 1/25, the historical lutes often had tapers much steeper than 1/30 and 1/25 would suffer much more from push-through, which is enough of a problem anyway.
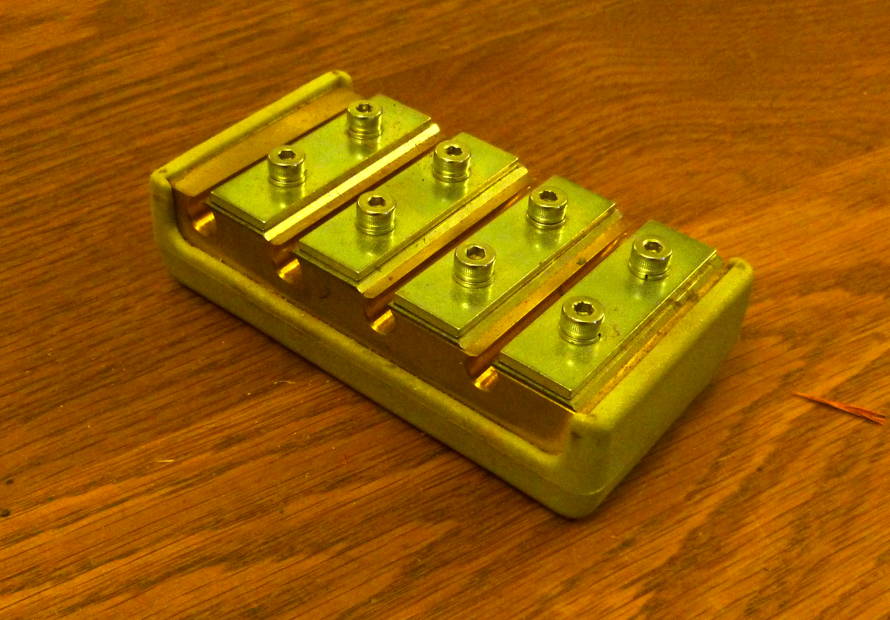
A peg sharpener
I show you how to make one of these for yourself in lesson 40 but, if you a feeling rich, you can buy a special matching peg shaping sharpener, produced by the same firm. If you are going to lash out and buy one of these expensive versions, do be sure to get the one that matches the small reamer (730101, not the one which today I see on their website 15/11/2012 they refer to as matching!! (They are sometimes not a very nice firm to deal with and are very reluctant to admit they could ever make mistakes, so double-check everything and keep records!)). Anyway this is the sharpener:
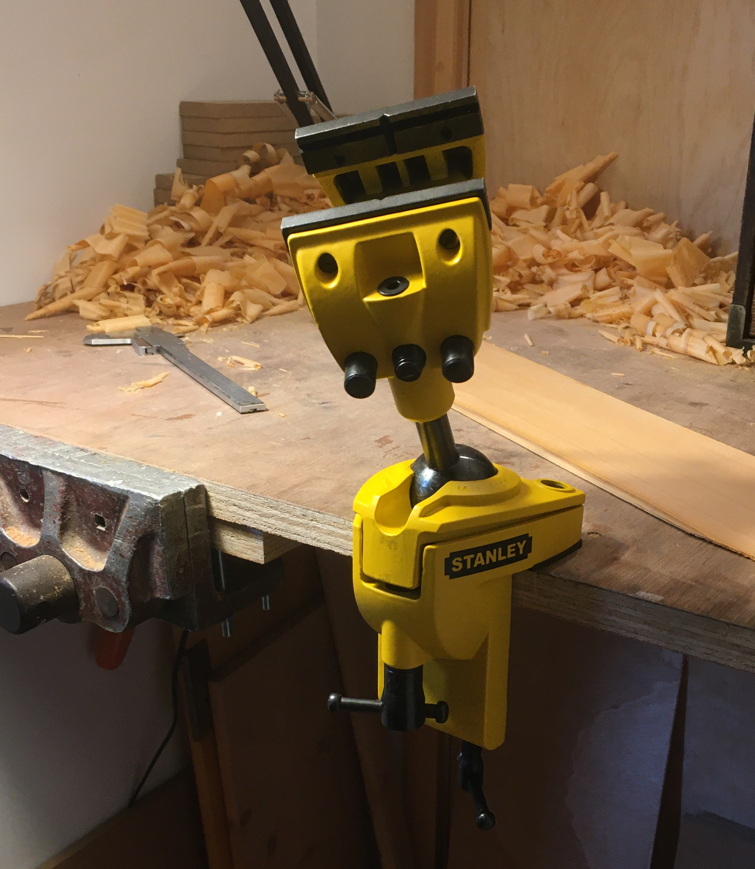
In this course I describe how to make your own swivel stand to hold the mould at various angles while you build the back of your lute. However I have now (2021) come across another much cheaper and better swivel vice made by Stanley, it’s called by them Stanley STA183069 Multi Angle Hobby Vice. In spite of its plastic appearance in the photo it’s actually cast iron and very solid, I recommend it unless you really want to make everything yourself! It is sold by FFX for about £18.50. I'm sure you can find it elsewhere as Stanley is a big international firm. Search for Stanley STA183069
On the right of the picture is a normal size straight cutting violin reamer which makes a long lute peg rather too thick for my taste and does not produce nearly such a smooth cut as the spiral version.
Finally, some means of sharpening your plane iron, knife and chisel.
Your dad's old oilstone is really not quite good enough! If you are really hard up it will do, but you will never be able to get a sharp edge and most of your work will be much harder as a result. There are two schools of thought here: either a very hard smooth stone such as an Arkansas stone, which scarcely wears away at all and remains beautifully flat; or a softer stone made up of tiny hard particles in a weak matrix, which wears away rapidly exposing new sharp edges all the time. I strongly prefer the latter system which is exemplified in the Japanese water stones and the Belgian stones. Either way get a 1,000 grit for initial sharpening and a very fine grit, say 10,000 grit, for final finishing. The German firm of Apex [The box says Apex-Sal-Abziehsteine] produces a very economical double-sided stone which does both jobs admirably. All these stones, whatever the system chosen should be used with water, not oil, as a lubricant to wash away the swarf out of the pores of the stone.
I think that's the lot!