Build your own Renaissance Lute!
LESSON 7
Cutting and bending the first rib
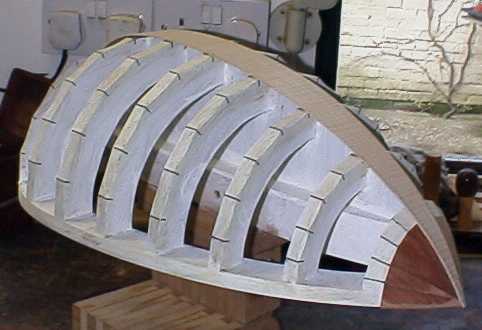
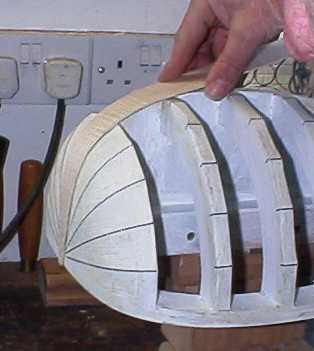
When I was planning this course I intended not to paint the mould, as being an unnecessary step for you, and in truth it is not absolutely necessary for you. But it turned out to be necessary for me, because certain photographs did not come out properly unless there was a very good contrast. And in fact being white does make it easier to see the marks when you are peering underneath an overhanging rib. So on the whole I would recommend it unless you are really anxious to get on with the actual lute.
You need to unscrew the neckblock and then paint the mould with household emulsion paint, this is better than gloss paint as it does not seem to soak into the MDF so readily and it dries quicker too.
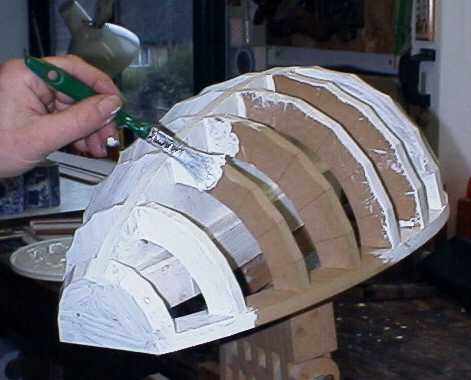
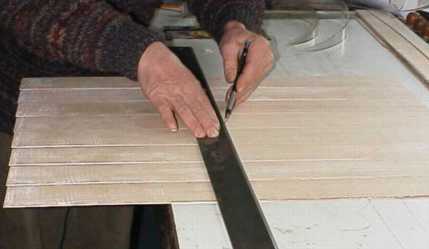
One coat is enough, but two gives a smarter look. I just used one coat! After this has dried mark out the rib joints with a marker pen.
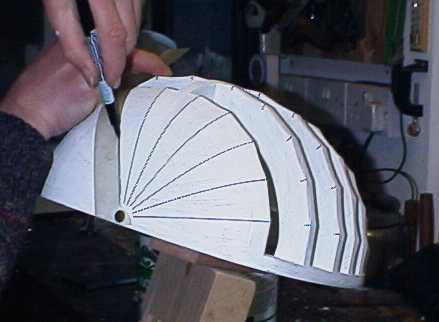
Mark the joints on each angle of the cross-sections and carry these marks a little way down onto the sides of the cross-sections. This is so that you will be able to see them when fitting the ribs.

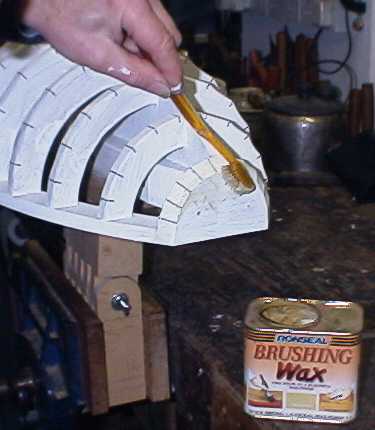
Lastly, wax the whole outer surface of the mould so as to ensure that you can get the back off the mould when it’s finished! You need to do this even if you have not painted the mould Use an old toothbrush and any type of wax, this is just what I had in the workshop but floor polish, furniture polish, candle wax, even colourless shoe polish works perfectly well.
When the wax has dried, screw the neckblock back into position and return to your rib slices.
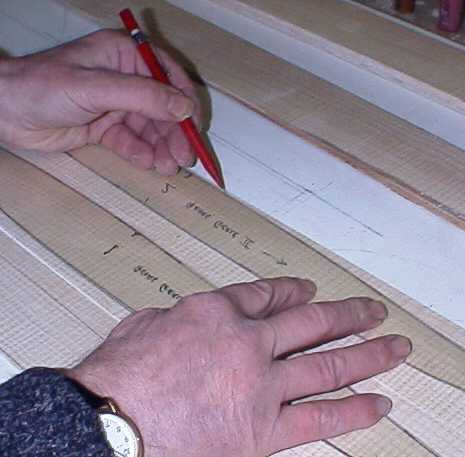
If your wood has any kind of figure at all, even a little feature that appears in some of the rib slices, it will look much better if these all line up across the back of the lute. This is one of the things which immediately makes an instrument look professional. This is not as easy as it sounds because, to start with, all the ribs are of slightly different lengths and then, once you have cut and bent the ribs, it is amazingly difficult to see features which were very obvious when you laid the slices out in order. But when the lute is varnished up, all will once again become painfully obvious, even to your admiring relatives! Taking either end of the ribs as a marker point is not reliable because these ends are subject to quite a bit of alteration as you fit each rib. So after you have finished the outer surface of your ribs, lay them all out in very careful alignment with each other, and then draw a pencil line straight across all of them.
As you can see from this diagram, if the figure is slanting at all, it would be very difficult to line it up properly by matching the figure on one side of a rib to the figure on the other side of the next rib.
If it is as regular as the sketch, it would be possible to line up the figure lines with each other. But in that case each slice would be stepped up or down in relation to its neighbour and you need to check that you have room for all the ribs on the resulting parallelogram.
Also this will give a very powerful swirling diagonal look to the instrument, a bit like a barber's pole; this can be vividly striking but it's not to everyone's taste. Whatever system of lining up you use, I would strongly urge you to plan it now and to mark the result with a straight line across the middle, a pencil line is so much easier to see and line up while building, than a grain figure, however striking.
Lutes always have an odd number of ribs and are always built outwards from the central rib, so now draw round the rib templates for the three central ribs. Take the first two rib templates and lay them out on your three planed rib slices in the position you planned. Template number one is for the centre rib and is fairly symmetrical. Template number two is the next rib round towards the bass side of the lute. Mark round the templates onto the wood with a good thick bold pencil. Then turn template number two upside down and put it in position for the rib next to the centre on the treble side of the lute. Mark round this template.
I find it best to mark the centre rib more or less exactly as the template but for all the other ribs, I mark the edge that goes next to the previous rib as shown by the template but then on the outer edge I allow about 5 or 6mm extra width at each end to allow for the changes in angle at the ends which makes fitting tricky. In general be generous, it only means a bit more planing of the edges, whereas too mean is disastrous. Don’t forget that you should turn template 2 upside down when marking out the treble side rib, as shown here.
I would also put an arrow pointing to the neck end on each rib to show which way up it goes, it is very easy to make a mistake and start bending at the wrong end.
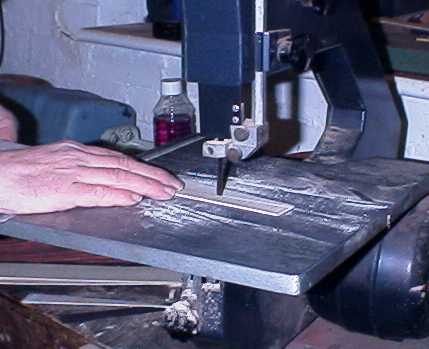
Now cut out just these first three ribs. Don’t cut out all the ribs yet. This very thin wood is rather apt to splinter out if you use a bandsaw with large teeth, so I tend to use a metal-cutting blade in a small bandsaw.
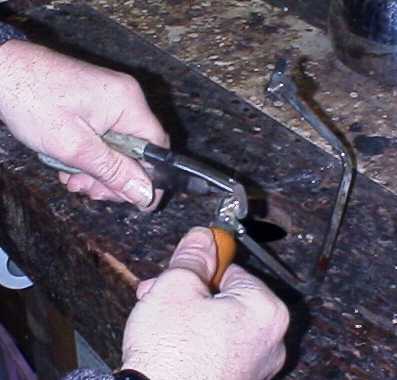
However it is actually very easy to cut these out using a small frame saw fitted with a fine-toothed blade. This is much cheaper than buying a bandsaw! In order to cut along the length just twist the blade top and bottom to point sideways with a pair of pliers.
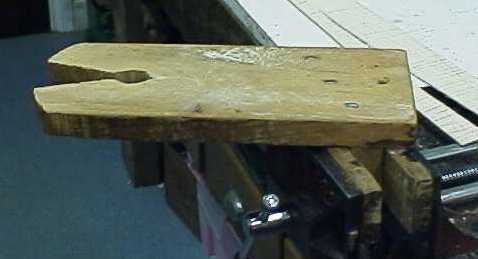
Make up a little saw table like this to go in your vice.
Then cut out along the lines like this.

Make sure you keep outside the lines! It doesn't matter how irregular your cut, so long as you are outside the line. It’ll get easier with practice.
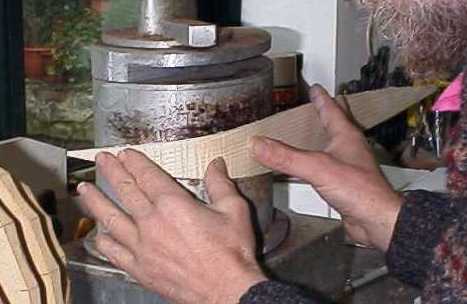
Now to bend the first rib. This is actually not such a difficult matter as it often seems to those outside the magic circle! The bending iron should be hot enough for spit to bounce off, but not so hot that it scorches the wood. If you are in polite company test it by flicking a bit of water at it, if it just lies there sizzling, it’s not hot enough.
Now comes the fun bit! Bending is not difficult with such thin wood, but if you have never done it before it's worth practicing to get the feel of your wood. You have the perfect practice pieces in the offcuts that you've just cut off the rib slices. A good practice routine is to bend the piece of offcut into a smooth bend to fit the end of the lute and then when you've done that, to bend it completely straight again. This gives you a true sense of how to control the wood.
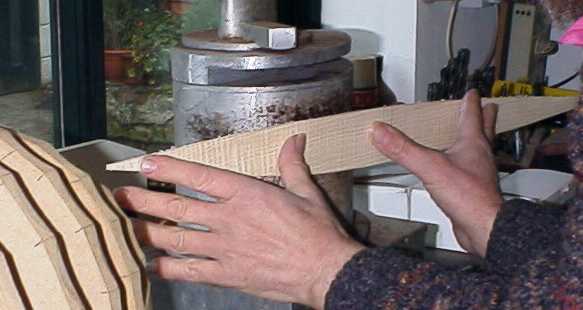
Wood bends because the cellulose softens in heat and hardens again when it cools. Just like hair in the permanent waving process. This means that the wood has to be hot right through, so you must be careful to leave it in one position long enough for the heat to travel through the thickness, but not so long that the inner surface scorches. The dark woods are more forgiving in this respect than sycamore which scorches quite easily. But of course this will be on the inside of the lute so it’s not too critical. Start at the point of maximum bend. If you put your thumb on the outside of the wood where it’s against the bending iron you will feel the temperature rise as the heat comes through. Just as it gets too hot for comfort the wood will gradually feel softer and more pliable. This softening is very subtle and you need to train yourself to detect it. Notice how far apart my hands are and how wide spread the fingers are; this is to make the most delicate kind of contact with the wood, the most sensitive to subtle changes in its resistance. This is something that you don't normally learn consciously but if you are consciously thinking about it you will shorten the learning time.
Push it further into the bend and move the point of contact gradually round to the next part of the bend.
When you've got what looks to be the right shape, hold that shape and remove the wood from the heat and allow it to cool while still holding the shape. If you don't hold the shape while it cools, it will straighten out quite a lot. As it is, it will straighten a bit, but after that the shape will be stable, in fact for years! You can accelerate the cooling by blowing on it.
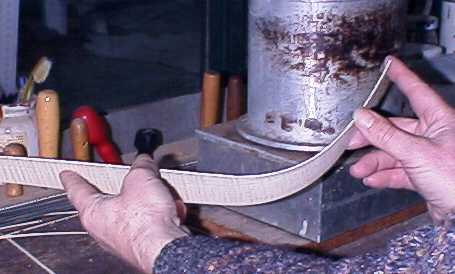
Check your curve against the mould and adjust as necessary.
Aim to get as smooth a curve as possible. You don't want a curve made up of a series of straights with sharp bends between. This is where the exercise of straightening out the bent trial piece is so revealing; it shows you how much control you ought to have. When you come to do the ribs take as much care on the curves as you have had to to get your trial piece straight.
The rosewoods and kingwood are really very easy to bend smoothly, though the process does bring their oils to the surface where they burn with a nice smell and blacken the bending iron. This is not important, some rosewoods will bubble with oil on the outer surface as they bend. It doesn't matter at all and will sand off easily later.
Figured sycamore is the most difficult to control, because the wavy grain means that you are more or less bending endgrain wood in places and this is very weak and liable to snap. Some people recommend a bending strap of thin metal which you cramp to both ends to support the outer face by preventing it having to undergo tension stresses. In practice this is not necessary with such thin wood as lute ribs, and it does increase the complexity of the business of getting the right shape. You are continually cramping and uncramping the strap and it’s hard to hold the curve while it cools etc. etc. Much more important is to concentrate on keeping a smooth curve without hard spots. You will soon know from your test piece whether you've got problems and if the test piece keeps snapping, you have!
If so, try using a piece of thin aluminium or shiny steel as a backing but held in the hands, not cramped. The effect of this is to reflect more heat back into the wood from the outer side and so reduce the temperature gradient within the thickness of the rib. But you will need to hold it there a bit longer so the metal itself can get hot, otherwise it will have the reverse effect and cool the outer side. If this doesn’t work for you, try wetting the inner surface of the wood so that steam is produced as it hits the bending iron. This steam will help soften the wood. Normally though, wetting is entirely unnecessary for lute ribs.
If you are using figured sycamore or ash like mine, you will find that the figure itself will crinkle up a bit during the heating and bending process, so that a slightly undulating surface results. This is normal and largely unavoidable, you can see it on many surviving lutes and on the sides of old violins and cellos. It’s part of the attraction of the wood. But if it seems excessive, you will need to press hard with a small block of solid wood so as to squeeze the rib between the block and the bending iron to hold it flat as it bends, if that doesn’t sound too Irish. On the whole I’d settle for quite a lot of crinkle before worrying.
Don't hurry the wood, allow it to heat through thoroughly at each point in the process before bending, but do try to bend it nearly to the final curve in the first go. This is where the amateurs lose out to the professionals, because wood gets distinctly stiffer and more resistant to bending after it has been heated through a few times. So if you can get it to shape in your first bending you will stand a much better chance of avoiding trouble. This is because the actual moisture content within the cells dries out in the heat and, even if you wet the wood, you can only get the moisture back between the cells, not within them.
If you’ve been playing about with a rib for a long time and it seems to be getting more and more difficult, give up for the day, damp the rib and leave it overnight. The moisture balance will magically restore itself overnight and you can start again the next day with a newly pliable piece!
When you are happy with the test pieces, start with the centre rib. Bend the bottom end first where the bend is steepest. Don’t forget that the extreme end is more or less straight. Take great care to get the curves exactly right. When you have finished, the rib should sit in place on the mould without further help.